

OEM Bias Cutter Guide for Precision Cutting
2026-10-23
Precision in bias cutting isn't just a nice-to-have—it's the difference between a clean, repeatable production line and one that bleeds waste and rework. Yet many OEM guides gloss over the specific tolerances, blade geometry, and feed mechanics that actually determine cut quality. This guide changes that. Built on field data from AUGU AUTOMATION's engineering team, it breaks down what to look for in an OEM bias cutter, how to validate its cutting repeatability, and where most setups drift over time. If you're tired of vague advice that doesn't survive contact with the shop floor, keep reading.
What a Bias Cutter Actually Does to Fabric
Most people assume a bias cutter just trims fabric at a 45-degree angle, but that angle is doing far more than changing the shape of the piece. In woven fabric, the warp and weft threads usually cross at right angles and keep everything rigid. Turn that grid diagonally and the threads suddenly act like a linked chain—each one can slide and give a little against its neighbor. That's why a bias-cut edge stretches noticeably when you pull it, while a straight-grain edge barely moves.
This hidden stretch is not a flaw; it's precisely why bias-cut strips are used for binding, piping, and curved hems. The cutter itself—whether it's a rotary tool, a specialized tape cutter, or a simple pair of shears guided by a ruler—doesn't add stretch to the fabric. It simply exposes the natural movement that was already locked in the weave. Once you cut on the bias, the fabric wraps around curves without puckering and relaxes back into shape instead of fighting the seam.
Setting Up Your OEM Machine for Clean Edges
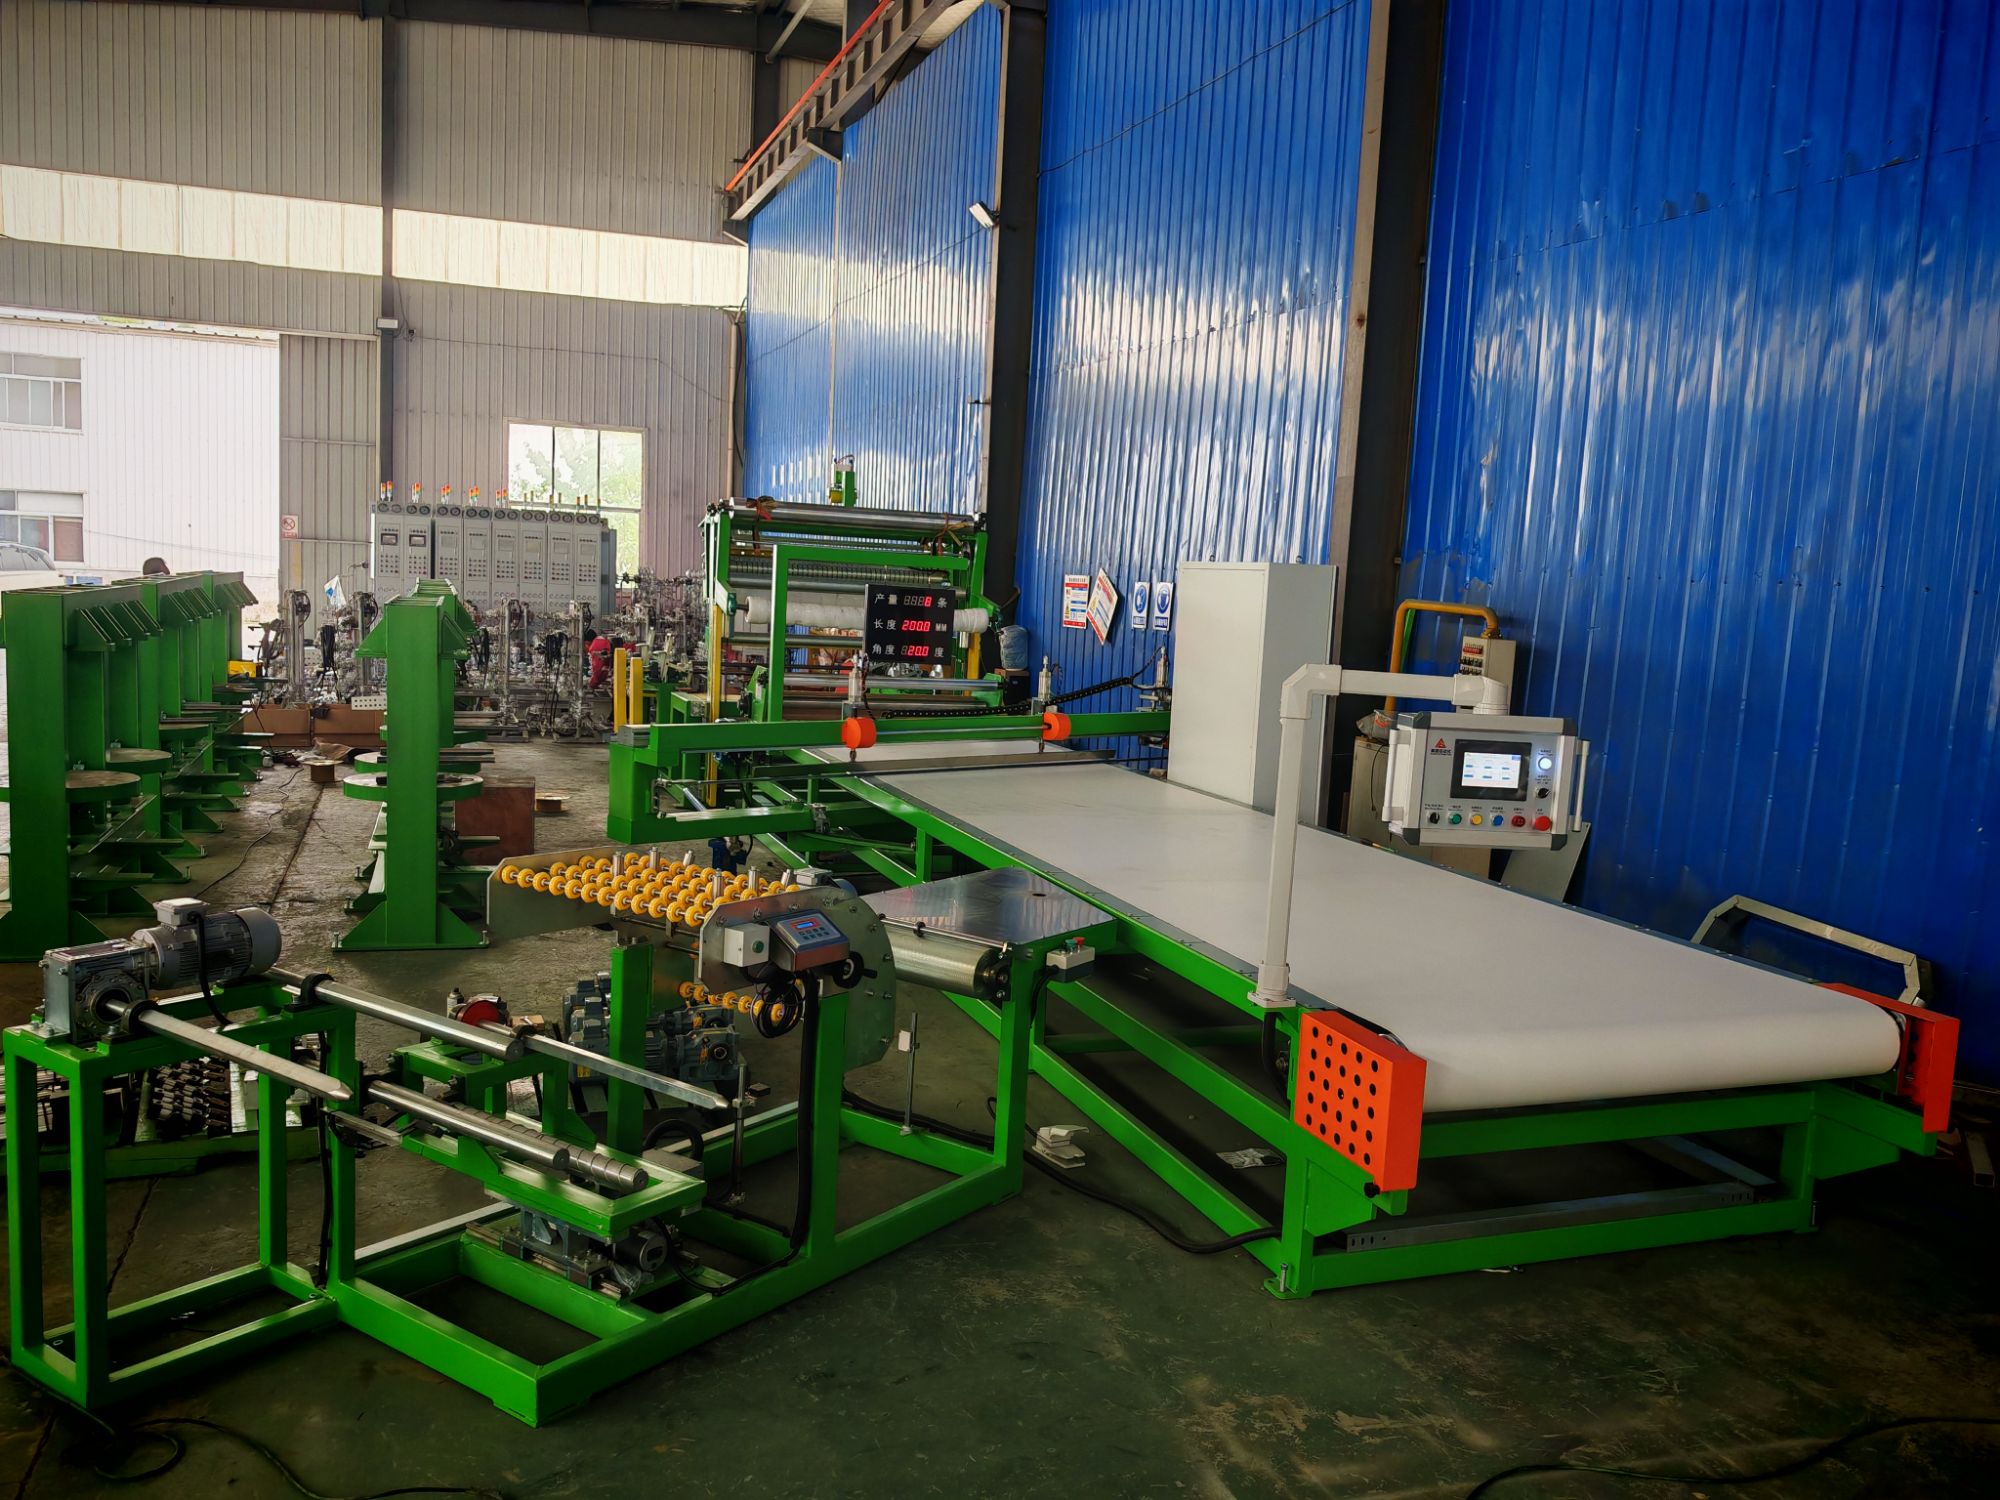
Start by verifying the cutting tool itself. A slightly dull or out-of-round bit will tear fibers instead of shearing them, leaving fuzzy or chipped edges no amount of sanding can fully hide. Mount a dial indicator against the tool shank and rotate the spindle by hand—anything beyond 0.01 mm of runout is worth correcting before you even think about feed rates.
Then match your spindle speed to the feed rate for the material you are cutting. Rushing the workpiece past a slow-spinning tool causes tear-out on exit edges; lingering too long overheats the resin or wood fibers and burns the surface. Start at the middle of the manufacturer's suggested range and make a short test pass. Look at the waste: small, consistent chips indicate a clean shear, while fine dust means you are rubbing more than cutting.
Finally, lock the material down so it cannot vibrate. Vacuum pods, toggle clamps, or a purpose-built spoil board all work, but the goal is the same—no movement between the sheet and the tool path. Even a tiny oscillation shows up as chatter marks along the cut line. Keep the cutting zone clear of debris as well; loose chips can get dragged back under the tool and mar an otherwise smooth edge.
Blade Angles and Tension: The Overlooked Variables
Most woodworkers chase tooth count or blade width, but hook angle and tension quietly shape every cut. A blade's hook angle—how far the tooth leans forward or backward—determines how aggressively it bites. Too much positive hook on a dense hardwood can grab and chatter; too little on softwood can burn and slow the feed. Matching the angle to the material isn't a fine-tuning luxury, it's what separates burn marks from clean edges.
Tension is even easier to ignore because it's invisible. Properly tensioned blades hold a straight, stiff line under load, resisting the drift and flutter that cause wavy cuts or uneven wear. Under-tensioning lets the blade wander and cup, while over-tensioning transfers stress to guides, bearings, and the frame. A simple lateral deflection test—pushing the blade sideways with a finger—often reveals whether you're fighting the tool or letting it work.
When blade angle and tension align with the machine's specs and the stock at hand, the rewards compound: less heat, less noise, longer edge life, and a finish that needs far less sanding. Small changes—one degree of hook, half a turn on the tensioner—can shift the outcome more than a new fence or a premium blade ever will.
Feeding Fabric Without Stretching or Slipping
Getting fabric to move smoothly through the machine starts with how you guide it. Instead of pulling from the front or forcing it under the needle, let the feed dogs do their job while your hands simply steer the layers. Keep your palms flat and slightly ahead of the needle, applying just enough pressure to keep the fabric stable without flattening pile or distorting weave. If you notice the top layer creeping faster than the bottom, pause and re-pin rather than tugging mid-seam.
Slippery fabrics like satin, chiffon, or coated nylons often need a different approach. A walking foot helps by adding an upper set of feed teeth that move in sync with the lower ones, reducing the differential that causes one layer to skate ahead. For extra control, place a strip of lightweight tissue paper or wash-away stabilizer under the fabric so the feed dogs have something to grip without leaving marks. After sewing, simply tear it away along the stitch line.
When working with knits or stretch wovens, avoid holding the fabric taut from both ends. Let the machine's differential feed or a slight downward pressure from your fingertips ease the fabric through without stretching it lengthwise. If the edge begins to wave or curl, stop and smooth the fabric back to its relaxed shape before continuing. A few extra seconds of adjustment prevents a finished seam that looks gathered or rippled on one side.
Routine Adjustments That Keep Cuts Repeatable
Most barbers treat a repeatable cut as a fixed sequence, but the ones who get consistent results actually make small, deliberate changes to their stance, sectioning, and tool pressure each time. Instead of relying on memory or muscle habit alone, they run through a short pre-cut reset: checking the client's growth pattern, adjusting the guard size for the crown, and confirming the mirror angle before the first clipper pass.
When a recurring mistake shows up—like a fade that always drifts high on the left side—start that section with a longer guard and work down, rather than forcing the same order. Change only one variable per appointment so you can isolate what actually causes unevenness. Repeatable cuts don't come from rigid repetition; they come from a system that adapts based on what you observed last time.
Finally, keep your tools and station layout identical, but adjust your body position relative to the chair. A slight shift in elbow height or a different stance can change how the blend reads in the mirror. Jot down those micro-adjustments after each cut, and you'll build a personal calibration guide that makes your results look the same even when the hair type doesn't.
Spotting Misalignment Before It Ruins a Project
Misalignment often hides in the gap between what stakeholders say they want and what the team actually builds. Instead of waiting for a formal review, ask each stakeholder to describe the project's purpose in their own words. If the product owner talks about cost savings while the designer emphasizes user delight, you've already found a crack worth addressing.
Another early signal shows up in meeting rhythms. When decisions made in one room get quietly reopened in another, or when people leave a planning session with different assumptions about who owns which deliverable, misalignment is already costing you time. A quick written recap after each milestone—listing agreed outcomes and owners—can catch these drifts before they become expensive rework.
Pay attention to the language of risk as well. If one group keeps flagging technical debt while another focuses only on launch dates, that's not just a difference in perspective; it's a misalignment of priorities. Surface these tensions early by asking pointed questions: What would make you walk away from this project? The answers often reveal hidden fault lines.
FAQ
The key is a rigid frame, minimal play in the pivot, and a blade that can be locked at the exact angle. For really fine cuts, look for a model with a hardened steel blade and a clear angle scale so you can repeat settings without guessing.
Yes, many are used on thin plastics, leather, paper patterns, and even light foil. Just make sure the blade is rated for the material—some coatings and adhesives will dull a standard steel edge quickly.
Check the blade for nicks before each project, keep the guide rail free of dust, and recalibrate the angle stops monthly if you use it a lot. A tiny amount of machine oil on the pivot helps, but wipe away excess so it doesn’t attract lint.
Rushing the stroke, using a dull blade, or letting the material shift under the guide. Another one is overtightening the clamp, which can distort thin fabrics and create a curved edge instead of a clean line.
OEM units are built to match the specifications of the original machine, so mounting points, blade alignment, and angle stops fit without modification. That saves time and usually gives better repeatability in production runs.
A good range is 30 to 60 degrees, though some cutters go wider. If you work with bias tape or tailored garments, having detents at 45 and 90 degrees is especially handy because those are the most common cutting orientations.
It often helps. Carbide or coated blades stay sharp longer and resist adhesive buildup. For ultra-fine fabrics like silk or organza, a fresh rotary blade with a smooth cutting mat underneath makes a visible difference.
Conclusion
Getting clean, repeatable bias cuts starts with understanding what the blade is actually doing to the weave. A bias cutter doesn't just slice fabric; it shifts the threads at a 45-degree angle, so any dull edge or inconsistent pressure will immediately show up as wavy edges or uneven strips. Once you've mounted the OEM unit and squared the guide rail, spend a few minutes testing blade angle and tension on scrap material before touching your project fabric. Many operators overlook these two variables, yet they determine whether the edge frays or stays crisp. A slight reduction in blade depth or a small tension adjustment often makes the difference between a frustrating afternoon and a stack of perfectly cut binding.
Feeding fabric without stretching or slipping is the next hurdle. Instead of pushing the material through, let the feed dogs or rollers do the work while your hands only guide the selvedge. If you find yourself tugging, stop and check the alignment of the guide bar and the condition of the feed surface. Routine adjustments—like cleaning the blade housing, checking screw torque, and replacing worn guides—keep cuts repeatable over long runs. And before you commit to a full project, watch for early signs of misalignment: strips that drift to one side, inconsistent widths, or a rhythmic clicking sound from the blade assembly. Catching these issues early saves fabric and prevents the kind of mid-project failure that ruins hours of work.
Contact Us
Contact Person: Lareina
Email: [email protected]
Tel/WhatsApp: +86 17561696737
Website: https://www.auguauto.com/